First some personal history.
I have been a casual rock climber for a number of years. Being a self proclaimed student in the art of mastery, I know full well that dabbling in any sport is no way to progress. It was with pure serendipity that a number of events happened to allow me to not only put some old fashioned effort into training, but also gather some wisdom about taking care of your tools that I would like to share.
As fate would have it, I had recently opened a CrossFit affiliate in a huge 5000sqft facility with 18ft ceilings (in 2009 when I opened, my gym would have been one of the largest in Canada). A few months later, the local "town operated" (read neglected and never used) rock climbing wall decided offices were a better use of the space. Thus, I found myself the new owner of a slick little bouldering cave and wall with all the holds and gear for next to no cost. Two loves, merged in to one. I could use CrossFit to train for climbing, and climbing to recover from CrossFit.
After mixing in a new daughter, and more work than hours in the day, I have given a new focus to my climbing as a form of meditation and relaxation. It's me time, and I love it.
As my practice gets better, and I find my hands getting stronger, I can hit deadpoints that seemed unfathomable a few years ago. My movements are less disjointed and jerky, and finally putting the time into this training thing seems to actually work... who knew?
However, mixing CrossFit, Olympic lifting, rock climbing, and a little kettlebell training together, and it adds up to some pretty major use -and abuse- of the hands. It also make you a defacto expert on hand care, because if you want to keep training, your hands need to stay in tip top shape.

But this post is about taking care of calluses, so lets start from the beginning....
How do hand calluses form?
Fact: Calluses develop as a result of mechanical stress to the skin.

The most common cause of hand tears or rips in CrossFit or rock climbing (or really any other activity where you hold something in your hand) is the build up of hardened callus tissue that gets so thick and dry that it can no longer flex or stretch around the objects in your hand. These thick edges can get caught between the bones in your hands and a barbell for example and the friction will tear, rip, or shear them completely off.
Not a pretty picture...
And if you've been lucky enough to sustain this injury, you know how much it stings.
So what is the secret to preventing hand tears?
Polish those suckers like they were your Daddy's prize winning 67 Camaro....
Er.
More like sand and contour those calluses like your Dad found that Camaro in an old barn buried under rusty machinery and hay bales. It's going to need some work.
Sand those hands smooth.
The trick to preventing rips and tears from training is to keep the calluses thick enough to protect your hands from wear, but thin enough to remain hydrated and flexible. More stretch equals less rips. You also want the edges of the callus pads to be thinner so that there is a contour to them. You need to get rid of any hard edges that might catch on a bar or climbing hold.
My hand care routine:
- In the shower, make sure both your skin and your Grindstone are nice and wet. Let the warm water soften your tough and dry skin a but. This will make the wet-sanding easier and allow your stone to bit into the skin better.
- If this is the first time you have tended to your calluses, or natures gloves as I like to call them, then you're going to need some time. You want to polish the general area and take of the top few layers of dead skin. Using the different edges of the Grinstone, make sure you take care to thin the top and bottom edges of the first knuckle pads, feathering from thin to thick towards the middle of the callus pad.
- If this isn't your first rodeo with the Grindstone, you should already have a fairly thin, but durable callus. Use the synthetic pumice like fine grit sand paper, to wet sand, or buff the callus pad to only remove the outer most layer of dead skin. This should only take 3-5 passes with the stone per callus pad.
- For best results, and to keep the calluses hydrated, apply a swipe or two of RIPT's Daily Dose hydration balm to the callus immediately after getting out of the shower. This is when the skin is most receptive to taking in moisture and a little will go a long way.
That's it. Simple isn't it.
Follow the above three steps on a daily-ish basis (see below), and you will prevent most rips from every happening.
That being said, technique plays a huge role, and your skin does have a genetic threshold - my hands explode after 75 reps on the pull-up bar no matter what I do.
How do I know when to take care of my calluses?
As a general rule, if you have any chips, flakes, or fissures, it's time to grind (hydrate as well).I find that a few days after a grind session my calluses will start to get some cloudy spots. This is a sign that the outer-most layer of skin is either drying ot dying. Time to grind.
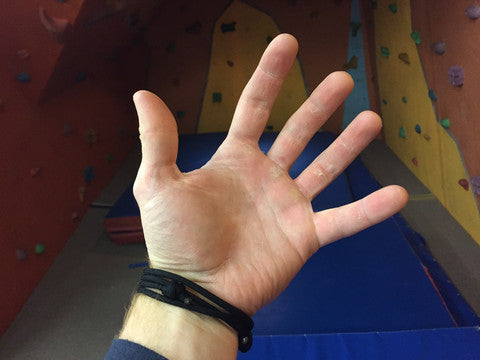
I have included in the post some pics of my hands after a pretty hard bouldering session and what they looked like after I hit the shower and did some callus maintenance.


Leave a comment: