Rips aren’t created equal.
When a client gets a large blood blister that turns into a deep rip in the palm of his hand, I usually recommend avoiding handwork for a day or two. Versus, when someone whimpers about some superficial skin loss on his thumb from hook gripping during high-rep hang cleans, I tell him to tape it up and suck it up!
Generally speaking, regardless of the rip, tape can be useful. It’s great for preventing rips, and it’s also great for reducing pain when you do rip. Further, it helps prevent further damage to the skin when you hit the bar.
1. Finger and Thumb rips
These guys, which often result from using a hook grip on the barbell, or even from high-rep pull-ups, bar muscle-up or toes-to-bar, aren’t usually all that deep (unless you’ve forgotten to tend to your calluses with your GRINDSTONE).
And when they do happen, they’re easy to deal with. All you need is 3 or 4 inches of cloth athletic tape.
** Make sure the tape is cloth hockey tape and NOT plastic first-aid tape. Plastic just won't stay on well. Also, don’t waste your expensive, super sticky ROCK tape on these rips.
** If the rip is deep, place a band-aid underneath the tape for more protection.
TAPE JOB
Step 1: Cut (or if you’re talented you can just rip it pretty easily) a piece of tape 3 to 4 inches long (enough to wrap around your finger or thumb 2 times).
Step 2: Cut this 4-inch piece of tape in two—lengthwise. (If you wrap the thicker piece of tape around your finger, it will likely get in the way of the knuckle, which is uncomfortable and restricts finger range of motion).

Step 3: Wrap the tape around (2 to 3 times around) your finger or thumb to cover the rip.

Step 4: Get back on the bar!
2. Palm Rips
These guys are trickier, especially if they’re not in the centre of the hand (it’s a bit more awkward to get the tape to stick nicely when the rip is close to your pinky finger or your pointer finger).
For taping, ROCK tape works best for these rips, but cloth athletic tape is ok, too.
Some athletes—like in this video—choose to create gymnastics-like grips with athletic tape that they can re-use over and over. Tape grips work, but I also find it works just as well to stick the tape directly to your hands, especially if you have super sticky ROCK tape. And it's way less time consuming!
TAPE JOB
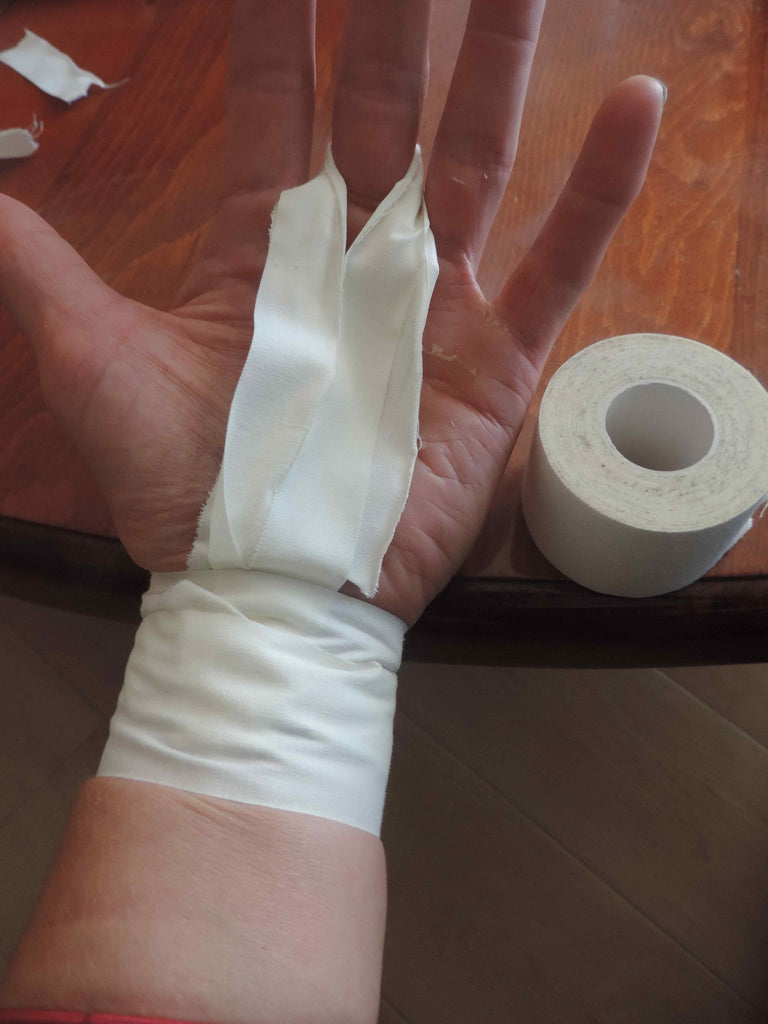
Step 1: Cut 2 to 4 pieces of ROCK tape about 6 to 8 inches long. ROCK tape is stretchy, so you don't need as much as if you're using athletic tape, where you'll need 10 to 12 inches, depending on how big your hand is. Essentially, you will need enough length for the tape to start at the base of your wrist, wrap around your finger, and then extend back to the base of your wrist.
Step 2: Place one end of the tape on the inside of the wrist. Stick it to your palm, cover the rip, wrap it around the closest finger, and pull the tape back to the base of the wrist on the inside of your hand. Pat it down with your other hand to make sure it is stuck nicely to your skin.

Step 3: Repeat Step 2 one, two or even three more times, depending on how much padding you think your rip needs.

Step 4: Cut another piece of tape—this time athletic tape—about 6 to 8 inches long. Wrap it around the wrist to cover up the two ends of the ROCK tape. If you don’t do this step, the tape will start peeling off your wrist as you’re working out. Again, athletic tape is fine for the wrists. Don’t waste your expensive ROCK tape!

3. Wrist Rips
These often come from false gripping on muscle-ups. I ALWAYS rip my wrists if I log more than 12 muscle-ups, so I usually use this tape job as a preventative measure first and foremost.
TAPE JOB
Step 1: Cut a piece of tape—either ROCK tape or athletic tape both work for this—long enough to wrap around your wrist 3 or 4 times.
Step 2: Wrap your wrist three or four times around, making sure you’re wrapping low enough to cover the entire area of your wrist that rubs against the rings when you’re doing muscle-ups.

Step 3: THE MOST IMPORTANT KEY HERE is if you’re using white tape you’ll need to leave a little slack in the tape. For you perfectionists out there, it will feel a little sloppy, but if you pull the tape too tight, there’s a good chance the tape will bust open when you’re on the rings, exposing your skin and defeating the purpose of the tape. The slack also allows the tape to almost stick to the rings, which can give you more confidence in your grip!
Check out this blog for another muscle-up tape job idea I’ve also used. It works wonders.
Leave a comment: